How is a Formula 1 helmet made?
During our visit to the Bell Racing factory, located in Bahrain, we had the opportunity to dive into the heart of the Formula 1 helmets manufacturing process. Mixing modern technology and traditional craftsmanship, explore the essential steps of this process that transforms raw materials into high-performance, customized helmets.
Motors Inside had the opportunity to visit the Bell Racing factory in Bahrain, just a few steps away from the Sakhir circuit. During this visit, we discovered the process of manufacturing Formula 1 helmets. We will explain everything to you.
Scan the pilot’s head
The first step in designing a Formula 1 helmet is to create a custom model. To do this, Bell offers two methods for scanning the driver’s head.
Portable scanners allow measurements to be taken with fairly accurate results, but less so than with a fixed scanner. When drivers or teams are on the move, Bell can scan a pilot’s head from their hotel room and send the files to the workshop in Bahrain.
The second solution is to have the driver come to the factory in Bahrain and scan his head to get an extremely precise 3D image.
Create the carbon sheets
The shell of an F1 driver’s helmet must be as light as possible while being resistant. Currently, the best material for this remains carbon. From carbon beads, like those visible in this image, carbon plates are manufactured by injection and under pressure.

Layer the carbon sheets.
These plates will then be stacked in different layers, as shown in the image below.


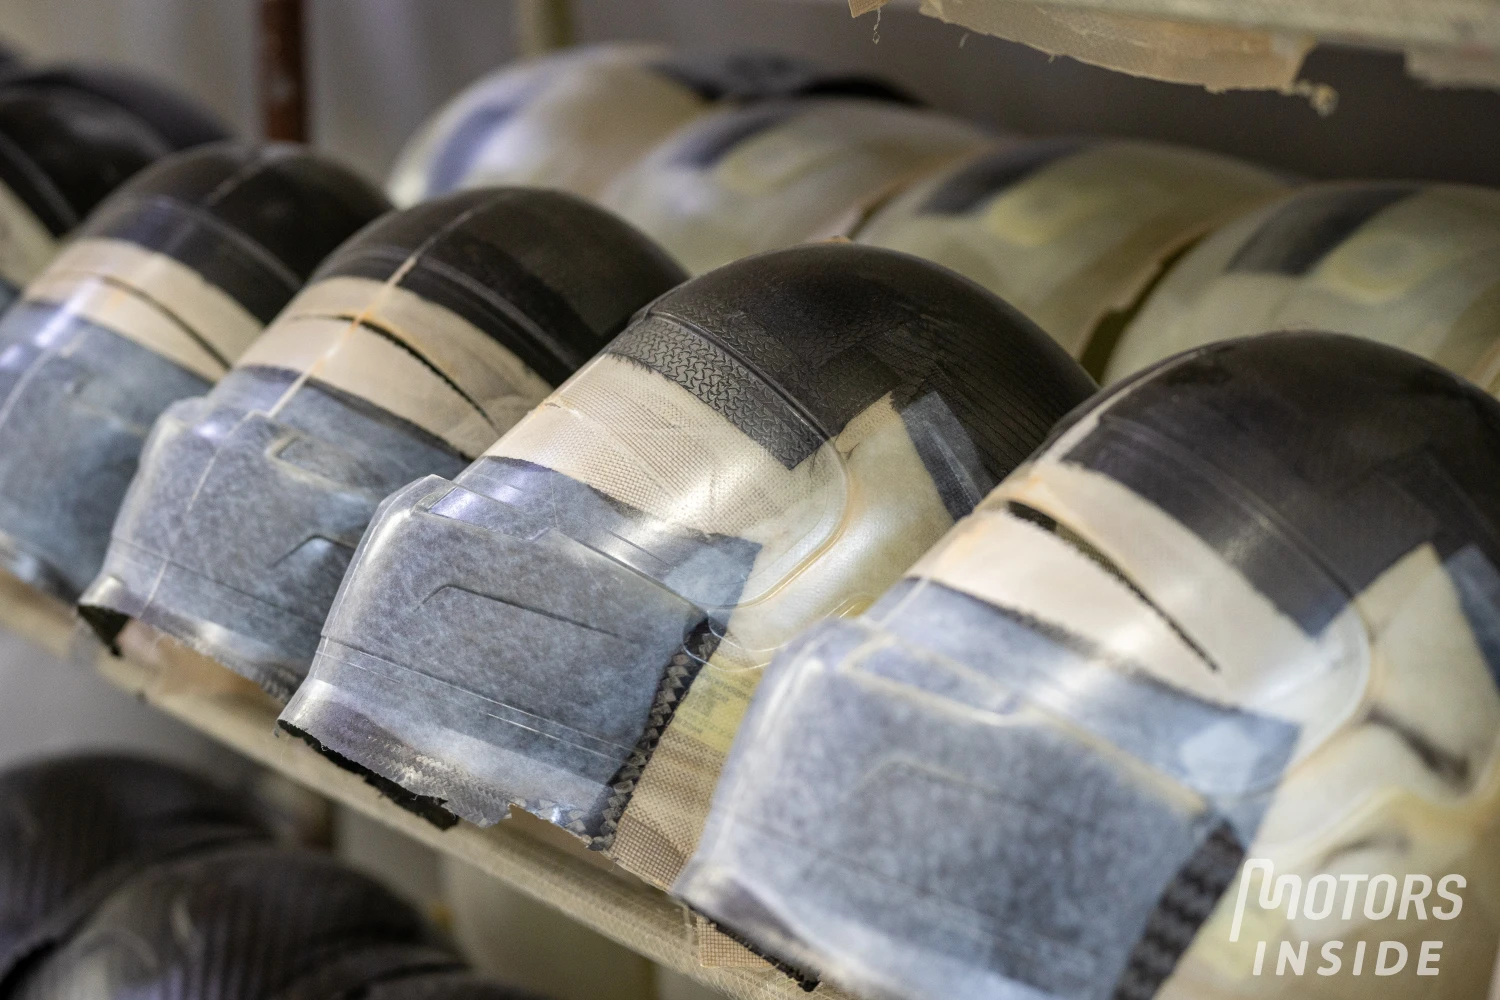
Molding the shell (the liner)
The leaves are then assembled and inserted into a mold in order to be subjected to high pressures. They are pressed against the mold and will bake in an autoclave oven to solidify the carbon into a helmet.

Prepare the shell.
Once the helmet is baked and solidified, it will be cleaned of its defects and prepared for the next steps. The visor part will be cut and deburred.
It is also at this time that the helmet is prepared to accommodate the various metal visor supports, the Hans support (the attachment system to secure the Hans to the helmet) as well as the space to position the earpieces or the drink system, according to the requested specifications.
Add the foam.
A foam is inserted into the shell with different density and thicknesses depending on the location in the helmet. Bell has at least 4 different thicknesses to adjust the comfort and pressure of the helmet on the rider’s head.
The foam is thus sculpted to the pilot’s head if a 3D scan has been realized, or according to standard dimensions. The foam is manually adjusted by Bell employees to perfectly match the expected pressure points on the different areas of the skull. For example, some drivers who have more hair than others have foam with different density and worked on according to the area where the hair takes up more space.
The painting
Before being painted, a Formula 1 helmet must go through a sandblasting process. This process consists of treating the surface of the helmet with a jet of sand or abrasive particles, creating a rough texture that promotes the adhesion of paint and stickers. By improving the grip, sandblasting ensures a durable finish, essential to withstand the extreme conditions of races and potential impacts.
Once this step is completed, a layer of primer is applied to ensure a uniform color and prevent paint from peeling. The paint is then applied in multiple layers, allowing for complex patterns to be created using masking techniques.
To preserve the protection provided by the carbon shell, only acrylic or polyurethane enamel coatings can be used, in accordance with the FIA International Sporting Code.
Each layer of paint must dry completely, which may require a pass through an oven to ensure a uniform finish. Once the painting is completed, a varnish is applied to protect the design and give it a shiny appearance, while increasing resistance to scratches and tough conditions encountered on the track.
To decorate the helmet, the driver presents his design ideas to a graphic designer, who takes care of bringing them to life. Water transfer decals are usually used, as they help reduce the weight by about ten grams.
At Bell, a portion of the painters are located directly in the Bahrain factory, while others are still in Belgium. According to the drivers as well, who have their own painters, the helmets are sent blank directly to the painters and then retrieved for assembly.
The attachments of the handle and the buckle
Each FIA helmet is equipped with fasteners to receive the Hans system, which keeps the driver’s head attached to the shoulders and prevents whiplash.
These metal fasteners are added after the paint.
The helmet closing buckle is also added at this time, to allow the pilot’s helmet to be fastened.

The visor
The manufacturing of a Formula 1 helmet visor is a detailed process that combines safety and visual clarity. It all starts with polycarbonate, a lightweight and resistant material, which is heated and molded to achieve the required curved shape.
After that, the visor receives a surface treatment to make it more resistant to scratches, and filters can be added to protect the pilots’ eyes against UV rays or improve visibility in certain conditions. Before being mounted on the helmet, each visor undergoes rigorous tests to ensure that it meets FIA safety standards.
Finally, it is attached to the helmet using specific fastening systems, allowing for quick replacement if needed. This process ensures effective protection while providing drivers with a clear view during the race.